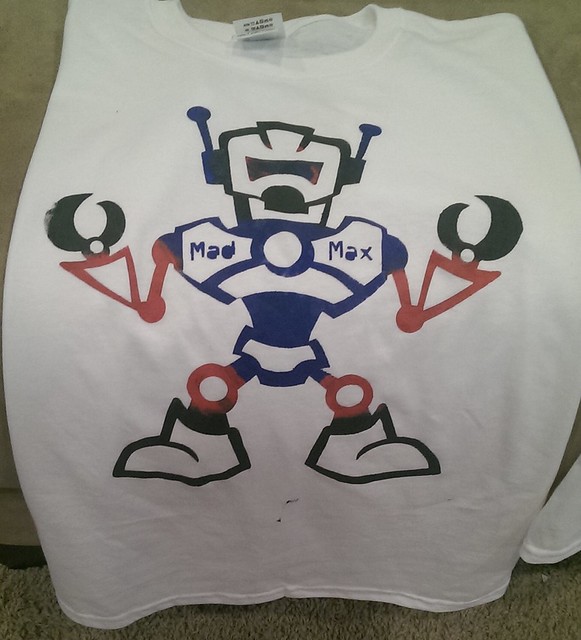
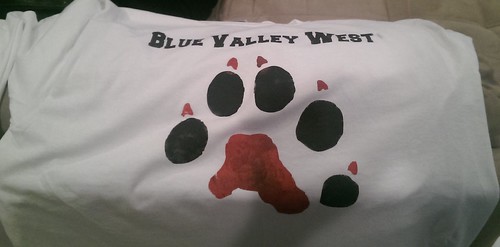
I've been on a T-shirt making kick lately. I think its because it's a craft that almost anyone can do. When my nieces and nephew were visiting we decided to do freezer paper T-shirts. I asked them and my kids what they wanted on their tshirts. I designed the layout in Cricut design space and cut out the freezer paper with my Cricut Explore (remember to put the freezer paper shiny side down on the mat).
For those who don't have an electronic paper cutter you can totally do this project by printing or drawing your design on the dull side of the freezer paper and cutting out the design with an exacto knife. Remember to keep the small pieces that will give your design definition (like the inside circles from letters)
Here's what you'll need to do your own freezer paper shirts:
- Freezer Paper (found near the foil in your local grocery store)
- Electronic paper cutter (like a Cricut) or an exacto knife
- T-shirt or other garment/item of your choice
- Fabric paints (I use the weekly 40% coupon at Hobby Lobby to cut costs here)
- Sponge brushes (found in the craft section of your local discount or craft store)
Once you have your design cut out of the freezer paper just iron the freezer paper to your T-shirt (no steam), shiny side DOWN - if you mess this part up you'll ruin your iron (ask me how I know)!
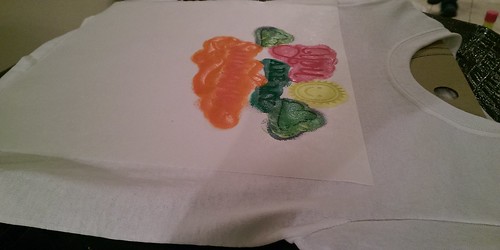
After you have the freezer paper completely ironed down, put a piece of heavy cardboard inside of the shirt so that no paint bleeds through on the back of the shirt.
Now you can use a sponge brush and T-shirt paint to color in the stencil. One tip here, don't try to do a really heavy coat. It's better to do light coats on top of each other (no need to dry between coats) so that you don't have unevenly painted areas.
Lay the T-shirt aside to dry for a few hours. When the paint is dry to the touch pull off the stencil (don't forget to remove the little pieces too). As long as the shirt is dry to the touch it is ready to wear. However, you shouldn't wash it for at least 48 hours (or for whatever length of time is listed on the fabric paint package). When you do wash it turn it inside out and wash with like colors.
I hope you have as much fun making your shirts as we did! Toodles!