Visit us at our new home at www.habitualcreator.com
Saturday, November 26, 2016
Saturday, July 11, 2015
Heat Transfer Vinyl Tshirts (w/Cricut Explore)

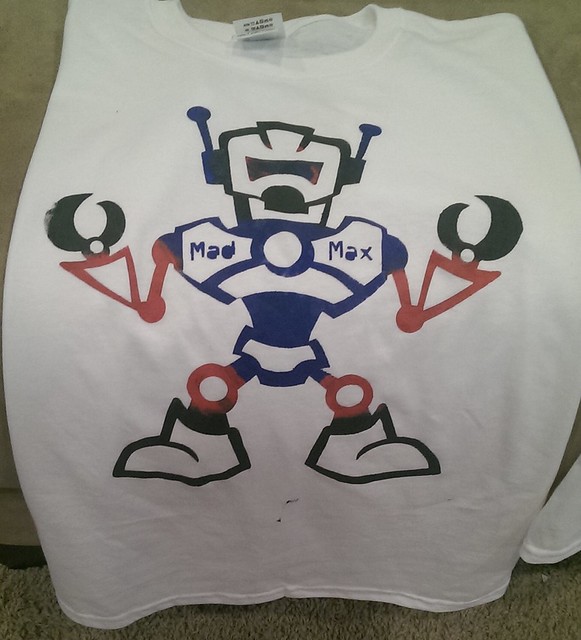
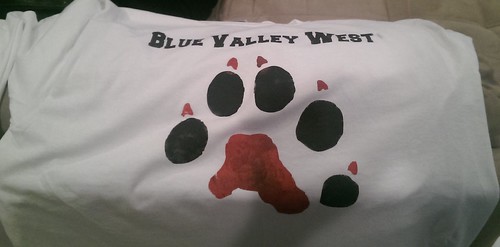
ARE YOU READY FOR SOME FOOTBALL!!?? I know we are more than a month away, but football camp and 7 on 7 season is here. What better way to support our son/brother than to sport his school colors/player's number? These only took a couple of hours using the Rhinestone Wizard, my Cricut and my handy dandy heat press (I'm so glad I have this -- it really speeds up the process). However, you could totally do this project with just a cutter and vinyl.
I used magic templates from The Rhinestone World and then imported the design into design space (for the football designs). I was really afraid that the font for the stadium seat wouldn't cut or weed properly, but it actually turned out easier than I thought - plus since its a grunge type font no would know if a piece was missing. :) Anyway, a super fun way to kick off the "early" football season! As for the wild-card shirt in the photo...I also pressed a track shirt for my hubby that was LOOOONG over due.

Toodles!
Saturday, July 4, 2015
Happy 4th of July!

Happy 4th of July!
This post will be short and SWEET!
While gorging on pinterest pinning I came across this delicious looking pie. It is a strawberries and cream pie! The fact that it was no bake was also a winner since my stove and grill space were already claimed! The next time I make this one I think I will omit the crust and add less water. It was really light and was a perfect ending to all that BBQ!
Click here for the recipe and I hope your holiday is safe and fun!
Saturday, June 27, 2015
Spicy Tomato Soup (In my DASH blender!)

It's been a while since I've made a post...sorry! While I have the best of intentions life tends to get in the way. Anyhoo, while outside today I noticed that I had several red tomatoes that needed to be picked and when I came inside of the house realized that my cherry tomatoes needed picking as well (I guess I have been out of it lately)! Since the tomatoes were a bit over-ripe I decided to try out my blender's soup making capabilities.
I originally bought my blender as an alternative to the $500 blenders out there and was pleasantly surprised with the results. While my blender wasn't cheap it was still less than half the cost of the more expensive ones because it was on sale. I got it from HSN because they were running a special on it ($199) instead of paying $400 for it at the local department store in my area. The name of the blender is DASH. You can find more about it by going here. It looks like they are out of stock on their website but HSN seems to always have them in stock.
Anyhoo. I just added some chicken broth at the bottom for more flavor (you actually don't have to add any liquid), tomato, parsley, chives and basil from the garden and a vidalia onion, Ms. Dash onion and herbs, seasoned salt and pepper (from the grocery store). I turned the blender's dial to "soup", pressed start and used the tamper to get things going. Once the blender started doing its thing I put the lid cap in place and walked away until I heard it stop.

When I opened the lid the soup was smoking hot!

I added a little cream and shredded cheese and voila - hot, fresh, soup!
I know many of us are trying to be healthier...I'd love to hear how you are using fresh ingredients and methods of cooking to give your family meals that are good to them and good for them.
Oh and if you are interested here is the YouTube video of the blender in action.
Toodles!
Sunday, March 22, 2015
Homemade Brown Sugar
A couple of weeks ago I was making pancake syrup for some really sweet college kids and realized that I didn't have enough brown sugar to make as much as I wanted them to have. I went ahead and gave them partial bottles and promised them a refill once their bottles were empty. In the meantime I started thinking...there has to be a way to make brown sugar from home.
After a few minutes of searching Pinterest I found a recipe from Martha Stewart's website. I decided to give it a try since I was making a sweet potato souffle that afternoon and needed brown sugar for the topping.
The steps were super simple (check out the recipe for exact amounts):
1. You basically take white sugar

2. Pour in molasses


3. Mix until well combined and you have awesome brown sugar!


Here's a photo of the souffle topping where I used the homemade brown sugar (brown sugar, pecans, flour & butter).

Toodles!
Friday, February 6, 2015
All Sewn Up and No Where To Go
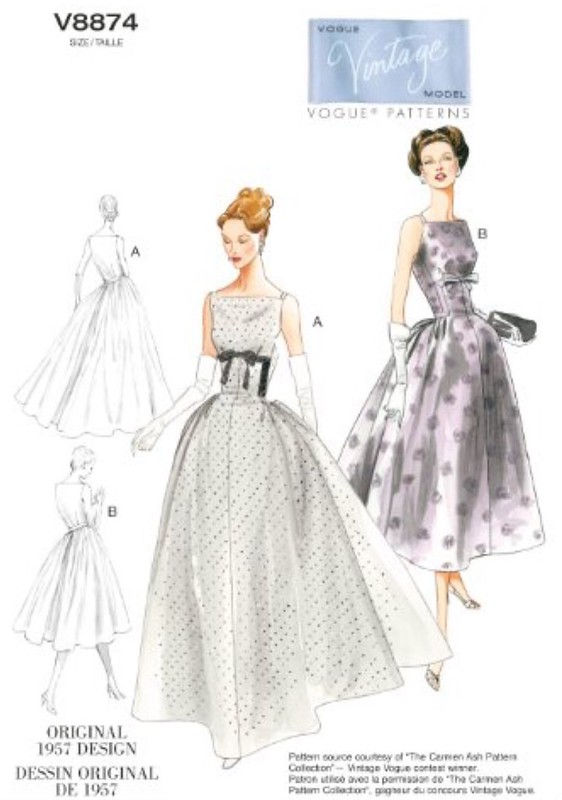
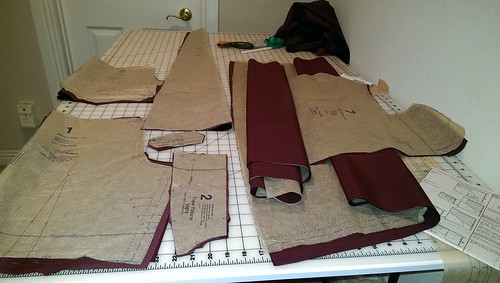
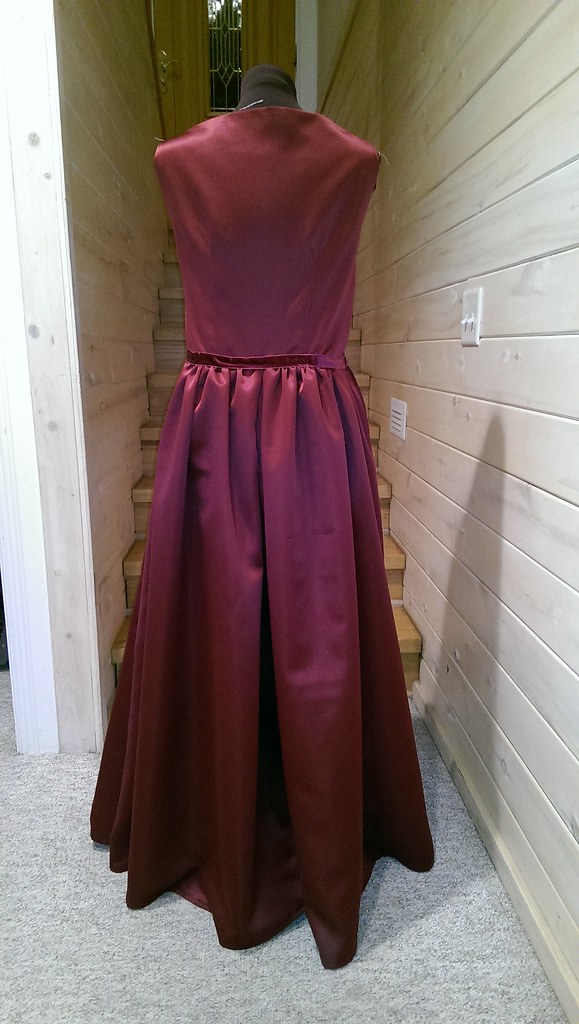
It's that time of year again, the annual NAACP Image Awards Viewing Party. I found the perfect color fabric - a nod to the 2015 Pantone color of the year - and a Vogue vintage pattern (originally printed circa 1957) that I liked. I made the dress over three and a half evenings. As you can tell by the title something went wrong...Well, I took two of my children to their well child check ups yesterday afternoon. I noticed my youngest daughter felt a little warm when I picked her up from daycare, but I didn't think much about it because I'm usually cooler than she is. Imagine my surprise when the doctor said "we can't give her any shots today because she two different strains of the flu". Whaaaaat!? I didn't even know that was possible!
So, neededless to say my plans for going out were over, but I wouldn't have had it any other way. There is just something about mommy being there when you don't feel well. She's all tucked into bed and is resting now - which is a beautiful thing.
Here are a few pictures of the pattern and the dress. I will say that the top of this dress was unusually wide so I added pleats to the front and took up the straps to make it fit better. I also omitted the bow. I don't think I'll sew this one again, but it was fun to make! Toodles!

Wednesday, January 28, 2015
Fun with Freezer Paper!

I've been on a T-shirt making kick lately. I think its because it's a craft that almost anyone can do. When my nieces and nephew were visiting we decided to do freezer paper T-shirts. I asked them and my kids what they wanted on their tshirts. I designed the layout in Cricut design space and cut out the freezer paper with my Cricut Explore (remember to put the freezer paper shiny side down on the mat).

For those who don't have an electronic paper cutter you can totally do this project by printing or drawing your design on the dull side of the freezer paper and cutting out the design with an exacto knife. Remember to keep the small pieces that will give your design definition (like the inside circles from letters)
Here's what you'll need to do your own freezer paper shirts:
Once you have your design cut out of the freezer paper just iron the freezer paper to your T-shirt (no steam), shiny side DOWN - if you mess this part up you'll ruin your iron (ask me how I know)!
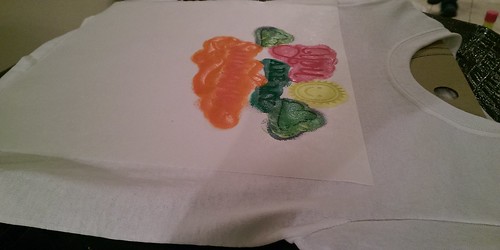
After you have the freezer paper completely ironed down, put a piece of heavy cardboard inside of the shirt so that no paint bleeds through on the back of the shirt.
Now you can use a sponge brush and T-shirt paint to color in the stencil. One tip here, don't try to do a really heavy coat. It's better to do light coats on top of each other (no need to dry between coats) so that you don't have unevenly painted areas.
Lay the T-shirt aside to dry for a few hours. When the paint is dry to the touch pull off the stencil (don't forget to remove the little pieces too). As long as the shirt is dry to the touch it is ready to wear. However, you shouldn't wash it for at least 48 hours (or for whatever length of time is listed on the fabric paint package). When you do wash it turn it inside out and wash with like colors.
I hope you have as much fun making your shirts as we did! Toodles!


Sunday, January 18, 2015
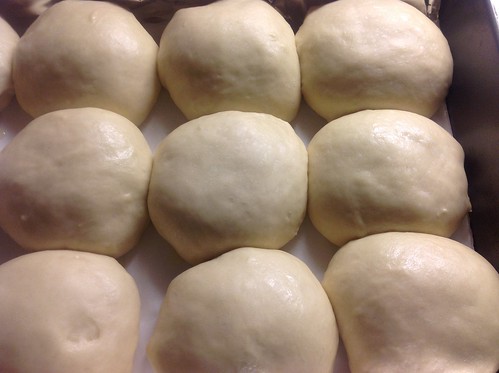
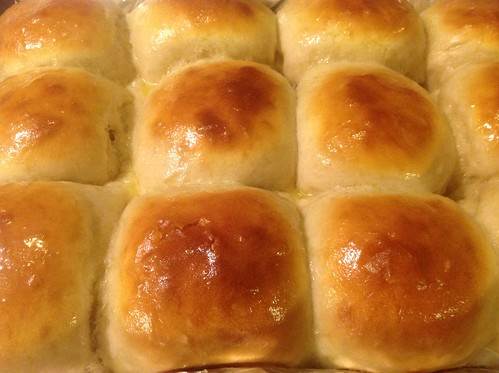
Lightning Fast Yeast Rolls
To say that I L.O.V.E. bread is putting it mildly. When I was little my dad worked for a national bread company so bread along with other treats were always around the house. I can remember calling my dad at work one day when my older brother was babysitting me to tell him that my brother wouldn't let me have any more bread (I had already had nearly half a loaf by myself). My dad asked me to put my brother on the phone. He told my brother, "its just bread, let her have it". Those words were music to my ears as I polished off a few more slices that day. My love of bread is still strong, but so is my desire to be able to fit into my clothes so I have to be mindful of my portions. :) Anyhoo, I've provided the link to the recipe right after the photos of the rolls I made tonight for dinner. Why go through the trouble?...because there are some days when only homemade will do!
The formed rolls resting for 10 minutes before baking.
The baked rolls after brushing with melted butter - yum!
Click HERE for the recipe!
Toodles!
Tuesday, December 30, 2014
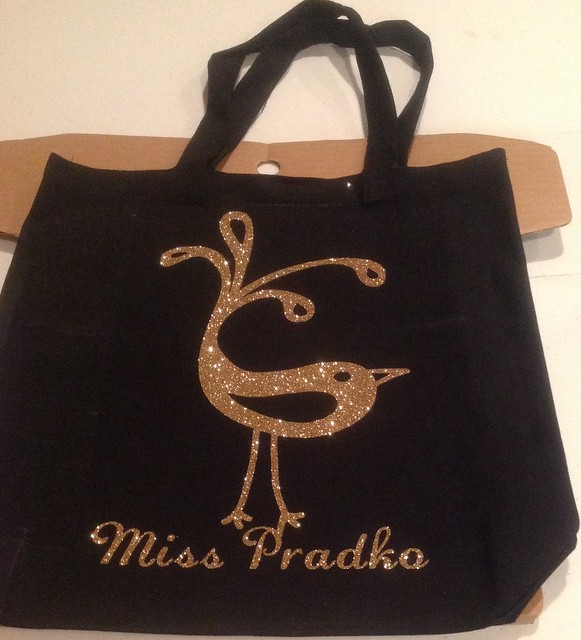
Two tote bags using the Cricut Explore!
Its been a while so I figured I'd better catch you all up on what's been going on in my world! I made quite a few handmade gifts, but in my haste I forgot to take pictures of many of them! Arrggh! However, I did take pictures of these super cute bags that I made for my secret santa and for my child's teacher. They were both super easy to make with my Cricut Explore (it took me about 20 minutes to make both bags)!
The first bag was made by using an existing graphic from the Cricut subscription library and then using a rectangle and the slice feature to get rid of the words and graphics I didn't want and then typing in the new words and inserting a basketball. I L.O.V.E. the slice feature!

The second bag was made by selecting a graphic from the library, typing the teacher's name, overlapping the two just a little and then welding the graphic andd the letters together. It sounds complicated, but it is literally just a few clicks to make this happen.
Thanks for checking out my post!
Toodles!
Friday, September 12, 2014
Spirit T-Shirts!!! Go BHS Tigers

So...my sweet husband got me the new Cricut Explore for my birthday. We made a deal that I would do some football shirts for him. When I originally priced custom t-shirts they started at $20. I knew that with my new gift I could make them for less than that. Using my PC, the Explore and black, gold and white heat transfer vinyl I was able to design, cut and iron the design onto a polo.
While I still have some learning to do I think my first try went really well. I wasn't sure if my iron would get hot enough, but it actually got too hot so now I know that I can lower the heat next time. I also tried my hand at converting a jpeg file to a svg file so that I could use a custom design. It wasn't very difficult, but I think I am going to try to find a cleaner graphic (I pulled it from a google image search so the quality wasn't that great). I can't wait to do shirts for me and the kids. When I do I'll share those as well.
Toodles!

Subscribe to:
Posts (Atom)