Showing posts with label homemade. Show all posts

Saturday, July 4, 2015

Happy 4th of July!


Happy 4th of July!

This post will be short and SWEET!

While gorging on pinterest pinning I came across this delicious looking pie. It is a strawberries and cream pie! The fact that it was no bake was also a winner since my stove and grill space were already claimed! The next time I make this one I think I will omit the crust and add less water. It was really light and was a perfect ending to all that BBQ!

Click here for the recipe and I hope your holiday is safe and fun!


Sunday, March 22, 2015

Homemade Brown Sugar

A couple of weeks ago I was making pancake syrup for some really sweet college kids and realized that I didn't have enough brown sugar to make as much as I wanted them to have. I went ahead and gave them partial bottles and promised them a refill once their bottles were empty. In the meantime I started thinking...there has to be a way to make brown sugar from home.

After a few minutes of searching Pinterest I found a recipe from Martha Stewart's website. I decided to give it a try since I was making a sweet potato souffle that afternoon and needed brown sugar for the topping.

The steps were super simple (check out the recipe for exact amounts):

1. You basically take white sugar


2. Pour in molasses


3. Mix until well combined and you have awesome brown sugar!

Here's a photo of the souffle topping where I used the homemade brown sugar (brown sugar, pecans, flour & butter).


Toodles!


Monday, August 25, 2014

Homemade Pasta!

I bought a pasta roller many months ago with the grand intention of making homemade pasta. Couple that with my growing desire to know what is in my family's food and you've got the perfect storm for actually getting my butt in gear and making it from scratch!

Let me say, the recipe that I ended up using couldn't have been easier! I used the one from one of my favorite books "Make the Bread, Buy the Butter". This book helps families decide whether its worth the time (and money) to make certain things from scratch. It really is a fun read that gives you the recipes and instructions to make many of your family's favorites in the comfort of your own kitchen.

On to the recipe...when you get the flour and eggs mixed up it will look sort of craggy, but this is perfectly fine. Before I started rolling out the dough I cut the big ball into four equal pieces. After I rolled the dough through the first two settings I cut the sheets in half width-wise so that I could actually manage them.

I learned the hard way that its best to continue to dust the pasta sheets with flour so that they don't stick and to go ahead and cut each sheet as you go (I ended up re-rolling a couple of the sheets because they got stuck to each other).

I'm really happy with the way it turned out. The pasta only took two minutes to cook (literally) when I put it in the boiling, salted water. The pasta came out super silky and luscious!

I hope you will take a leap and try your hand at homemade pasta or any of the other recipes in the book. The only drawback will be the fact that your family will want homemade pasta all the time! In the words of my eight year old, "Homemade is always best"! Toodles!


Saturday, August 9, 2014

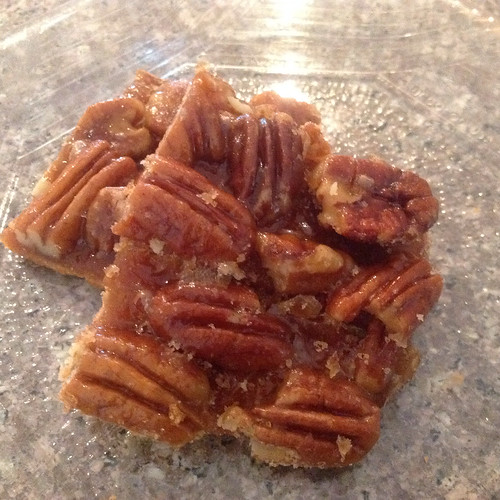
Pecan Pie Bark - A Delicious Discovery!


I really can't stand the texture of pecan pie, but my husband absolutely loves it. It is almost a sin to be a southerner and hate pecan pie (I get cross-eyed looks everytime I say it) :) Anyhoo...Enter the pecan pie bark, a yummy confection that is something between a pie and a cookie and has been approved by my entire family!

Since I don't want to be "that blogger" I want to make sure to give credit to the original blogger and guest blogger -- Great recipe - I found it during one of my Pinterest binges. :) I made some tweaks to the recipe based on previous baker's feedback and then added a few of my own. The original recipe can be found at http://wishesndishes.com/pecan-pie-bark/ and my tweaked version is listed below. Enjoy!

Pecan Pie Bark

Ingredients

1 T butter or margarine for greasing cookie sheet

12 graham cracker rectangles (may need more or less depending on length of cookie sheet

1/2 cup white sugar

1/2 cup packed brown sugar

2 sticks margarine or butter

1 T corn syrup

1 T water

pinch of salt

1/4 tsp cinnamon

2 cups pecan halves

1 tsp vanilla

InstructionsPreheat oven to 325.

  1. Lightly grease cookie sheet
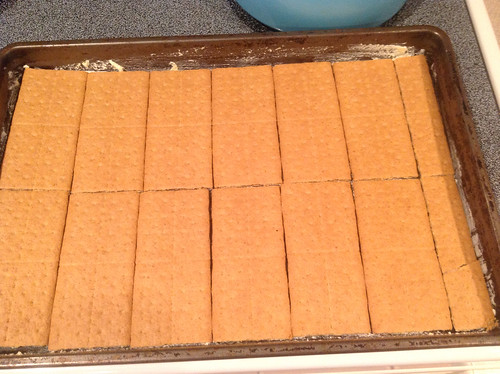
  2. Place graham crackers as close together as possible without ovrerlapping.You might have to break the last row of crackers to fit.
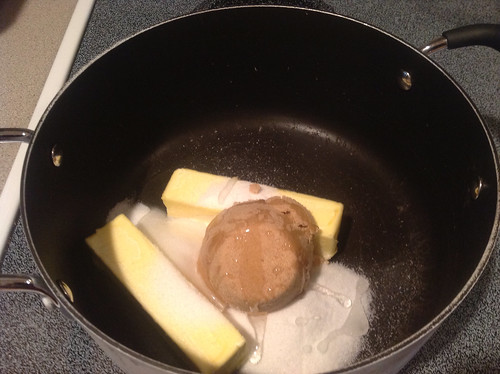
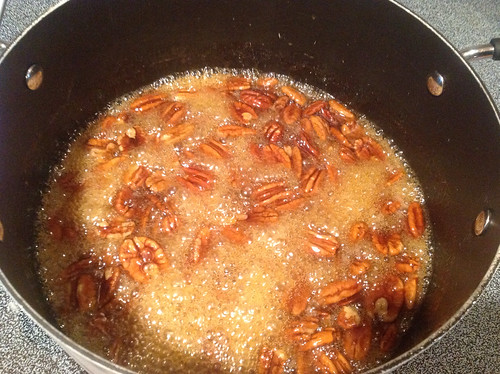
  3. In a medium/large sauce pot melt both sugars, butter, corn syrup, water, salt and cinnamon over medium heat until boiling.
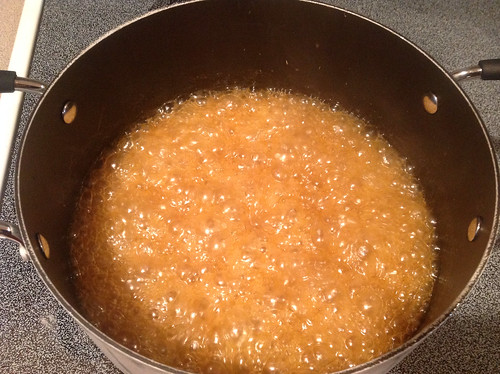
  4. Let it boil for two minutes, stirring occasionally to prevent sticking/burning.
  5. Add the pecans and boil for one additional minutes.
  6. Remove from heat and add vanilla.
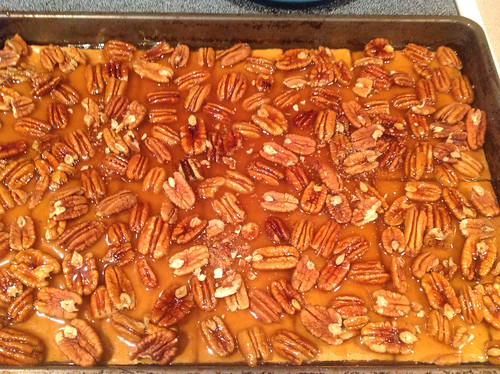
  7. Pour mixture over the graham crackers and spread to evenly distribute.
  8. Bake for 10-12 minutes.
  9. Remove from oven and cool completely before cutting or breaking in to pieces.
  10. Store in an airtight container.

Instruction #1-2 Instruction #3 Instruction #4

Instruction #5-6 Instruction #7 Instruction #8-9


Saturday, October 13, 2012

Simplicity 1900 - Handmade Baby Doll

Hi All!

Here is my latest sewing project! I am currently eliminating junk from my diet so my clothes sewing mojo is on hiatus until I reach my goal (with the exception of transition pieces and accessories...

I used broadcloth, 8.5 X 11 sheets of felt, assorted fat quarters, embroidery floss, fiberfill, thread,eyelets and grosgrain ribbon.

So here's the cute little doll that I made for a sweet little girl.


I cut out the pattern pieces a while ago and hand embroidered her face first to see if it was going to be a successful project or a hot mess. Once I finished her face I decided to finish her up today. I took pictures of some of the steps so that you can see how she came together. I am still training myself to stop at the right points in the project to take pictures (I get so caught up in the moment that I've completed several steps before I realize that I haven't snapped any photos! So, here we go...

This is what the front body looks like after embroidering the face, putting on the hair and top stitching around and on top of the hair.


The back of the body with top stitching on and around the back of the hair.


Legs and socks sewn together.


Arms sewn, turned and stuffed.


Arms and legs basted to the body front.


After attaching the legs and arms to the front of the body I put the back and front together (right sides together) and sewed all the way around the doll, leaving a small opening for turning. After turning the doll was firmly stuffed with fiberfill and the opening was closed using a whip stitch (not as neat as a ladder stitch, but it does give "rag doll" properties to this little cutie. Since she didn't have any clothes on I just took a head shot :).


On to the clothes - this is a little A-line dress that has a front that has been separated to allow for the contrasting pleat. The arms, bottom and back closure have simple double-folded hems. The collar was finished with binding and I used heat activated hook and loop tape for the back closure. A little rectangular piece was stitched (right sides together with a hole for turning), turned, pressed, stitched closed and tied in a knot to form a bow.


Here's the cape. It was cut out of felt. Two butterflies were also cut out of two colors of felt, folded in half and stitched very close to the fold. They were then attached to the cape by stitching along the seam that was just created. The cape's closure is also heat activated hook and loop tape.


The pattern originally called for the little shoes to be closed by a loop and a button, but I thought it would be cute to make these mimic ballet slippers. To do this I inserted two sets of eyelets on each shoe, cut and sealed two lengths of grosgrain ribbon, threaded the ribbon through the slippers and tied them around the dolls feet.


Here are a few more pictures of what she looks like.


Here's what I learned...

1. I should have cut the threads between her eyes (it's visible behind the fabric) or use a thicker broadcloth next time.

2. Double check to be sure that the fabric doesn't shift when sewing the back and front together.

3. Don't make the seam allowance so wide in the shoes (they went from being almost too big to almost too small!

4. Don't be lazy...I should have used pink thread for the socks (the dark thread is showing).

5. Use a contrasting color for the top stitching throughout the hair (all my nice stitches throughout her hair are practically invisible).

6. Continue to tighten up my embroidery skills (and use stabilizer next time)!

Thanks for reading my looooooooong post!


Monday, June 25, 2012

Homemade Vanilla Extract

I have been eyeing the homemade vanilla extract recipe in the new cookbook I just bought, "The Homemade Pantry".


I went online and made a bulk purchase of gourmet bourbon vanilla beans (about 52 beans for $15.00). If anyone has ever priced these at retail you know that two vanilla beans cost more than $10 after tax (yes, you read that right...ten dollars for two beans 0_o) I also got some of the best vodka (Skyy brand) I could find/afford/was willing to pay for.


Now for my church folks who read my blog...I am NOT a drunk...;). For those who don't know most extracts are made with some form of alcohol . However, when you cook with it the majority bakes out and for the times when you don't bake it out the alcohol content is very low (you run a higher risk of getting drunk off your morning mouthwash)!

Anyway...back to the matter at hand. I read through the recipe in my cookbook and browsed recipes online to get a general understanding of the process. Here a my steps:

1. I sterilized my jar and lid to be sure they were nice and clean.


2. I took out 10 vanilla beans and split them lengthwise with a sharp knife.


3. I added the split beans to my clean jar.


4. I filled the jar to the top with the vodka, put on the lid and screwed it shut (my family calls me Sheera because I put lids on too tight and usually need help getting them off later).


5. I gave the jar a couple of shakes and put it in a dark corner of one of my cabinets.

I'll have to remember to give it a good shake once a week. Most recipes say that it will be ready in three weeks, but for the best flavor six weeks is the minimum. I am so excited!

I'll be sure to post weekly pics of its progress. If all goes well I plan to start a batch in the fall to give as Christmas gifts for all the bakers in my life!


Thanks for looking and don't forget to check back to see how it's going! Toddles!


Thursday, April 26, 2012

Flour's Banana Nut Bread

I bought the new Flour Bakery cookbook and decided to try their banana nut bread recipe. Their method of whipping the eggs makes for the lightest and most moist banana bread I have ever made. I haven't made anything else from the cookbook, but i have been hearing nothing but great things about it! 

What quick bread recipes are your favorite?


Wednesday, April 25, 2012

Homemade Mozzarella Cheese

Oh My Goodness! I made homemade mozzarella cheese this evening and it was so easy! Had I known how easy it would be I would have made it along time ago. There are several websites that give the directions on how to make it, but I used Eat. Drink…Better’s instructions. I did not see the measurement for salt in the recipe so I just eye-balled it…probably less than ½ tsp. There are two items that you probably don’t have in your cabinet…citric acid and rennet, however, I found them easily at Whole Foods Market. If your store doesn’t carry the products both of them can be found via the internet.

Anyway…Here’s a quick rundown of the pictures.


1. Citric acid and the rennet.


2. What the milk looks like when the curds separate from the whey (the whey is the almost clear liquid underneath the white curds).


3. The curds and a small bit of whey after I scooped them out of the pot.


4. Curds after the first kneading.


5. The finished, shaped mozzarella balls.


Making homemade cheese was an awesome experience and has fueled my desire to try more projects that were everyday practices for my ancestors. Cheese made at home…in 2010…who would have thought!?

Toodles!